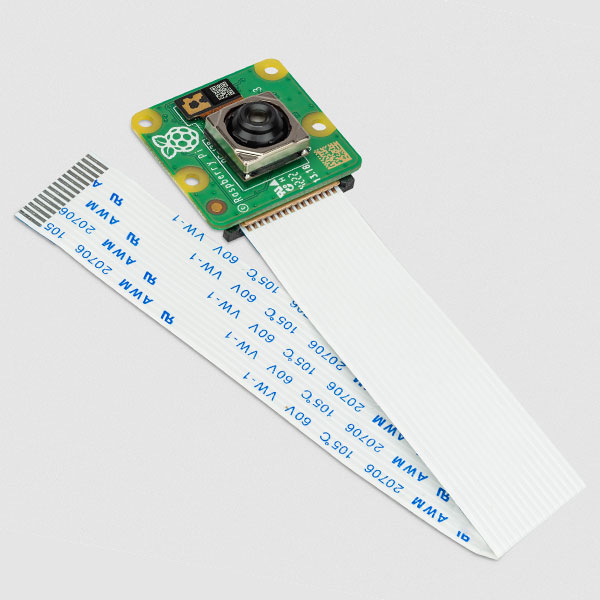
Raspberry Pi Camera time lapse
In this project you will learn how to make your own time-lapse camera with your raspberry pi 4 or raspberry pi 5. In this project everything is explained so that it is easy to do yourself and also easy to adjust to what is needed. We will talk about how you can configure the time-lapse completely yourself and it is also explained how the functions in the code work. Let's get started right away!
Overview of project steps
- Open terminal
- Create project folder
- Creating and explaining config.yaml
- Create and run installation script (dep.bash)
- Creating Python script (timelapse.py) and code explanation
- Check directory structure
- Timelapse shooting
- Watch video
- Common Problems & Tips
1. Open Terminal
- Graphics : Click on the black and white terminal icon (top left of the menu bar).
- Shortcut key : Press Ctrl+Alt+T.
- The terminal is your “command line” where you enter all subsequent commands.
2. Create project folder
In the terminal, type:
mkdir ~/timelapse_projectmkdircreates a new directory.~represents your home directory (e.g./home/pi).
Go to that folder:
cd ~/timelapse_projectcd= change directory, you “go to” the folder.
Check that you are in the correct folder:
pwdpwdshows your current location in the file system.- You should see something like
/home/pi/timelapse_project.
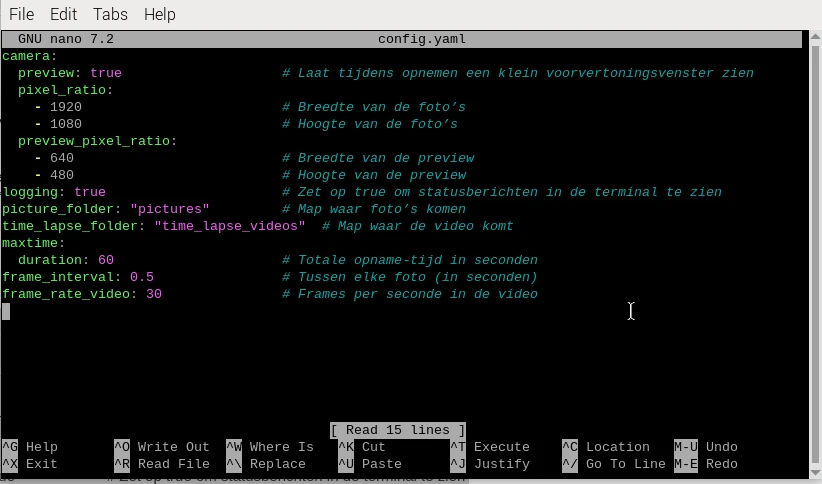
3. Creating config.yaml and explanation
Open the editor:
nano config.yamlnanois a simple text editor in the terminal.
Paste this content :
camera:
	preview: true # Show a small preview window while recording
	pixel_ratio:
		- 1920 # Width of the photos
		- 1080 # Height of the photos
	preview_pixel_ratio:
		- 640 # Width of the preview
		- 480 # Height of the preview
logging: true # Set to true to see status messages in the terminal
picture_folder: "pictures" # Folder where pictures will go
time_lapse_folder: "time_lapse_videos" # Folder where the video will go
maxtime:
	duration: 60 # Total recording time in seconds
frame_interval: 0.5 # Between each photo (in seconds)
frame_rate_video: 30 # Frames per second in the video
Save : Press Ctrl+O, Enter.
Close : Ctrl+X
What does this do?
Config.yaml is also the configuration file for all the python code you will run. You tell the script how the camera should work, where the files should be located, how long it will run, and how fast the final video will be.
4. Create and run installation script ( dep.bash )
Create the file:
nano dep.bashPaste this in:
#!/usr/bin/env bash
sudo apt-get update -y
sudo apt-get upgrade -y
sudo apt-get autoremove -y sudo apt-get install python3-picamera2 -y
sudo apt-get install python3-libcamera -y
sudo apt-get install python3-yaml -y
sudo apt-get install python3-shutil -y
sudo apt-get install python3-opencv -y # 'cv2'
sudo apt-get install python3-numpy -y
sudo apt-get install python3-pathlib -y
Make executable:
chmod +x dep.bashExecute:
./dep.bash
What's happening?
updateandupgradeensure that your system is up to date.autoremovecleans up.installfetches specific Python packages and camera libraries.
5. Create Python script ( timelapse.py ) and code explanation
Open a new file:
nano timelapse.pyPaste the complete code ( from picamera2 import Picamera2 to cleanup() ).
from picamera2 import Picamera2
from libcamera import Transform, controls
import libcamera

import yaml
import shutil
import cv2
import numpy as np
from pathlib import Path
import os
import time

# Open het configuratie bestand en lees hem
with open('config.yaml', 'r') as file:
    config = yaml.safe_load(file)

# Maak een camera object
camera = Picamera2()

# Zet maximale stappen
iterations = int(config["maxtime"]["duration"] / config["frame_interval"]) # maximale tijd / interval
picdir = config["picture_folder"]
log = config["logging"]


def images_to_video(image_folder=f"{config['picture_folder']}", output_path=f"{config['time_lapse_folder']}/output.mp4", fps=30, pixel_radius=3):

    if log:
        print("Foto's naar video aan het converteren...")


    folder_path = Path(image_folder)

    # Get list of numbered images
    image_files = sorted([f for f in folder_path.glob('*.jpg')
                     if f.stem.isdigit()],
                    key=lambda x: int(x.stem))

    if not image_files:
        raise ValueError("Geen fotos gevonden")

    # Read first image to get dimensions
    first_frame = cv2.imread(str(image_files[0]))

    # Create VideoWriter object with H.264 codec
    height, width = first_frame.shape[:2]
    fourcc = cv2.VideoWriter_fourcc(*'mp4v')  # H.264 codec
    out = cv2.VideoWriter(
        str(output_path),
        fourcc,
        fps,
        (width, height)
    )

    # Process each image
    for img_path in image_files:
        frame = cv2.imread(str(img_path))

        # Apply Gaussian blur based on pixel radius
        if pixel_radius > 0:
            frame = cv2.GaussianBlur(frame,
                                   (pixel_radius*2 + 1, pixel_radius*2 + 1),
                                   0)

        out.write(frame)

    # Release VideoWriter
    out.release()
    cv2.destroyAllWindows()


def create_directorys(folders: list):
    for folder in folders:
        if not os.path.exists(f"{os.getcwd()}/{folder}"):
            try:
                os.mkdir(f"{os.getcwd()}/{folder}")
                print(f"Map aangemaakt : {folder}")
            except Exception as e:
                if e.errno != errno.EEXIST:
                    print(f"Error bij het aanmaken van een map: {e}")
    return


def cleanup():
    shutil.rmtree(f"{os.getcwd()}/{config['picture_folder']}") # verwijdert alle foto bestanden
    exit()


def maak_foto_en_sla_op(i):
    try:
        # Maak de foto
        camera.capture_file(f"{os.getcwd()}/{picdir}/{i}.jpg")
        if log:
            print(f"foto {i} opgeslagen")
    except Exception as e:
        raise e


def error(e):
    images_to_video()
    cleanup()
    print(f"Er is een error voorgekomen ({e}). De fotos die zijn gemaakt zijn opgeslagen en worden omgezet in een time-lapse")
    exit(1)


# configureer de code
camera_config = camera.create_still_configuration(
    main={"size": (config["camera"]["pixel_ratio"][0], config["camera"]["pixel_ratio"][1])},
    lores={"size": (config["camera"]["preview_pixel_ratio"][0], config["camera"]["preview_pixel_ratio"][1])}
)

camera_config = camera.create_preview_configuration(
    main={"size": (config["camera"]["pixel_ratio"][0], config["camera"]["pixel_ratio"][1])},
    lores={"size": (config["camera"]["preview_pixel_ratio"][0], config["camera"]["preview_pixel_ratio"][1])}
)

camera.configure(camera_config)


camera.start(show_preview=config["camera"]["preview"])

camera.set_controls({"AfMode": controls.AfModeEnum.Continuous, "AfSpeed": controls.AfSpeedEnum.Fast})


create_directorys([config["picture_folder"], config["time_lapse_folder"]])

print("Let op : Het bestand output.mp4 word overgeschreven ook al staat hij er. Als je nog een oude video heb sla hem dan onder een andere naam op of op een andere plek om hem nog te behouden")
if log:
    print("Programma begint met opnemen over 3 seconden")
time.sleep(3)
if log:
    print("Programma maakt nu foto's")


try:
    for i in range(1, iterations+1):
        try:
            maak_foto_en_sla_op(i)
            time.sleep(config["frame_interval"])
        except Exception as e:
            error(e)
            cleanup()
except Exception as e:
    error(e)
    cleanup()

images_to_video()
print("Klaar!")
cleanup()
Save and Exit : Ctrl+O, Enter & Ctrl+X.
Explanation of the most important pieces of code
Imports
from picamera2 import Picamera2
import yaml, shutil, cv2, numpy as np
from pathlib import Path
import os, time
Gets all the modules we need.
Loading config
with open('config.yaml','r') as f: config = yaml.safe_load(f)Reads your settings from config.yaml .
Calculating iterations
iterations = int(config["maxtime"]["duration"]/ config["frame_interval"])Calculates the total number of photos taken.
Create folders
def create_directorys(folders):Ensures that pictures/ and time_lapse_videos/ exist.
Taking pictures
def maak_foto_en_sla_op(i): camera.capture_file(f"{picdir}/{i}.jpg")Takes a single photo and saves it as 1.jpg , 2.jpg , etc.
Photos to video
def images_to_video(...):Combines the photos and (optionally) adds blur.
Error handling
def error(e): images_to_video() Catches errors, ensures that photos taken are not lost.
Main program
camera.start(...)
for i in range(1, iterations+1):
maak_foto_en_sla_op(i)
time.sleep(config["frame_interval"])
images_to_video()
cleanup()- Start the camera
- Runs through all iterations
- Take photo, wait interval
- Makes video, cleans up
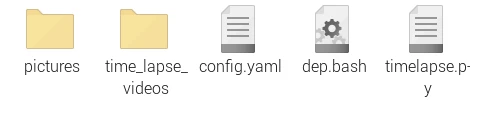
6. Check directory structure
In your timelapse_project folder you should now see:
ls -R ├──config.yaml
├── dep.bash
├── timelapse.py
├── pictures/
└──time_lapse_videos/7. Run timelapse
- Make sure you are in the project folder (
cd ~/timelapse_project). - Type:
python3 timelapse.pyWhat you see:
- In the terminal status messages (“photo 1 saved”, …).
- After 3 seconds a countdown (if logging is enabled).
- The camera takes pictures at your interval.
Wait until Klaar! appears in the terminal.
8. Watch video
After completion the timelapse is in:
~/timelapse_project/time_lapse_videos/output.mp4On the Pi itself :
omxplayer time_lapse_videos/output.mp4On your computer: transfer the file via SCP/USB and open in VLC or another player.
9. Common Problems & Tips
| Problem | Solution |
|---|---|
| Camera not available | Check sudo raspi-config → Interface Options → Camera |
| Permission error | Run script with python3 (not as root), and check file perms |
| Low disk space | Adjust maxtime or frame_interval , or expand SD card |
| Save photos | Remove or comment cleanup() from the end of the script |
| Video codec issues | Use omxplayer or adjust fourcc in images_to_video() |