GPIO Project 7 - Stepper motor intro
Beginner
30 Minuten
€167.09
In this project, you will learn how to control a stepper motor using a Raspberry Pi. A stepper motor rotates in precise steps, allowing you to accurately control movement. This project uses a 28BYJ-48 stepper motor and a ULN2003 driver.
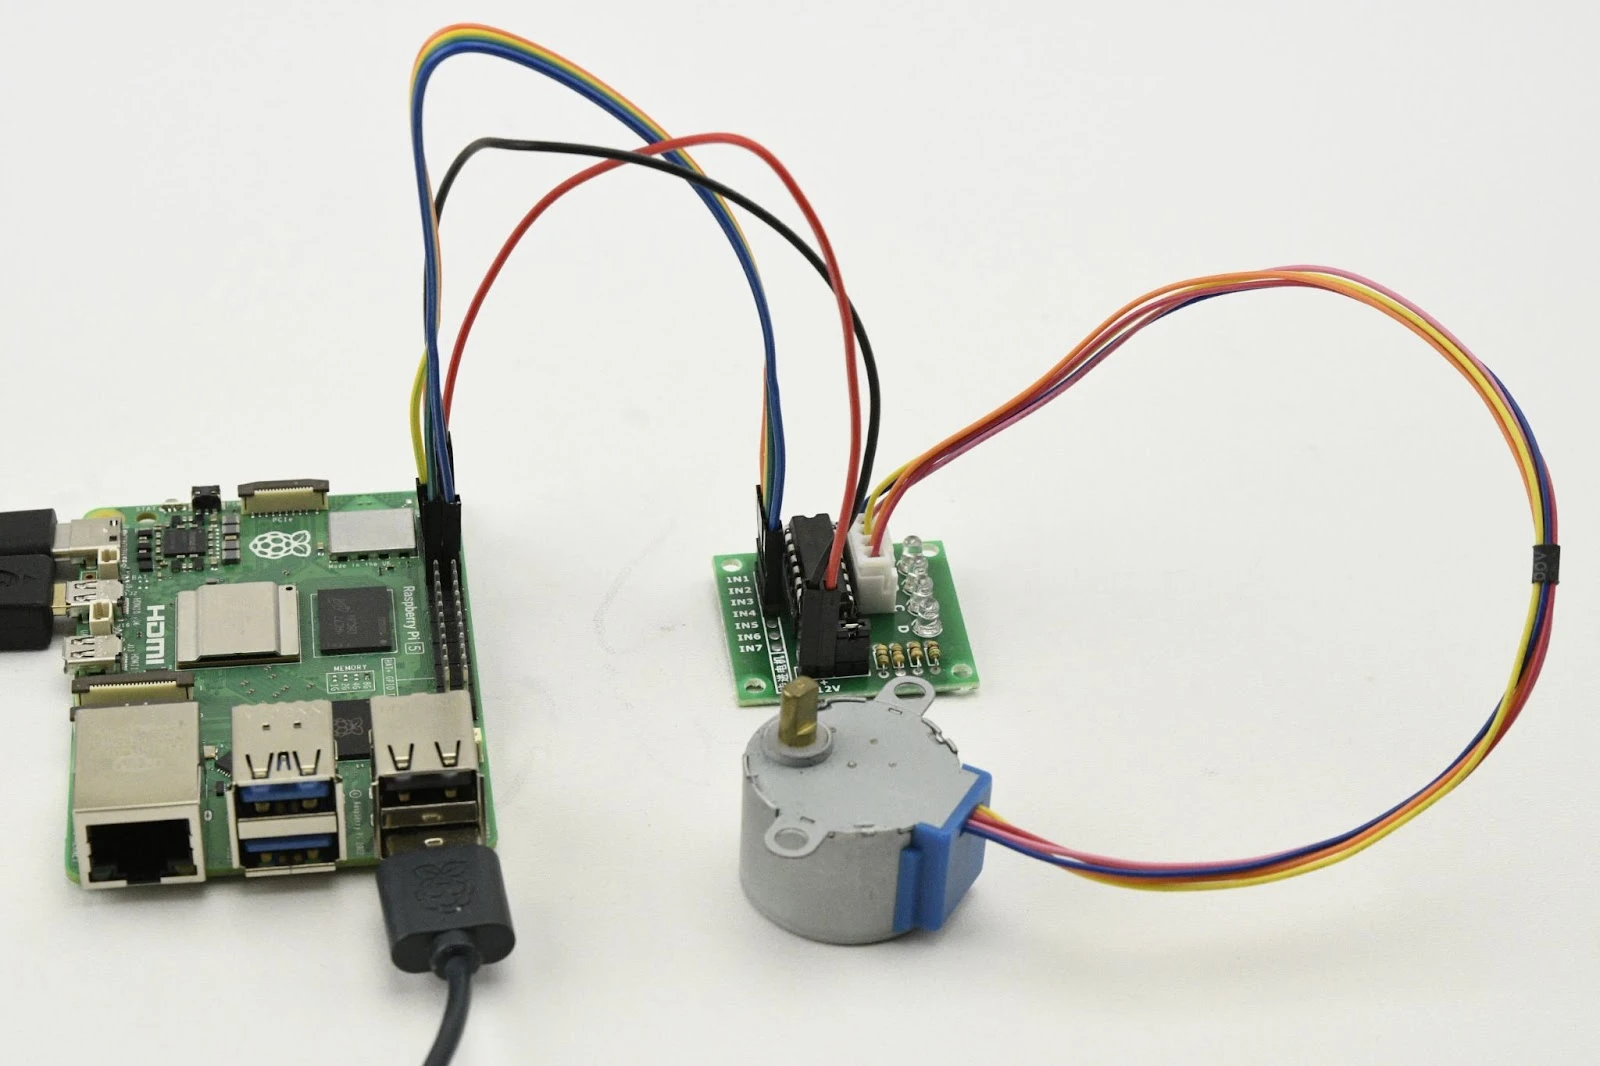
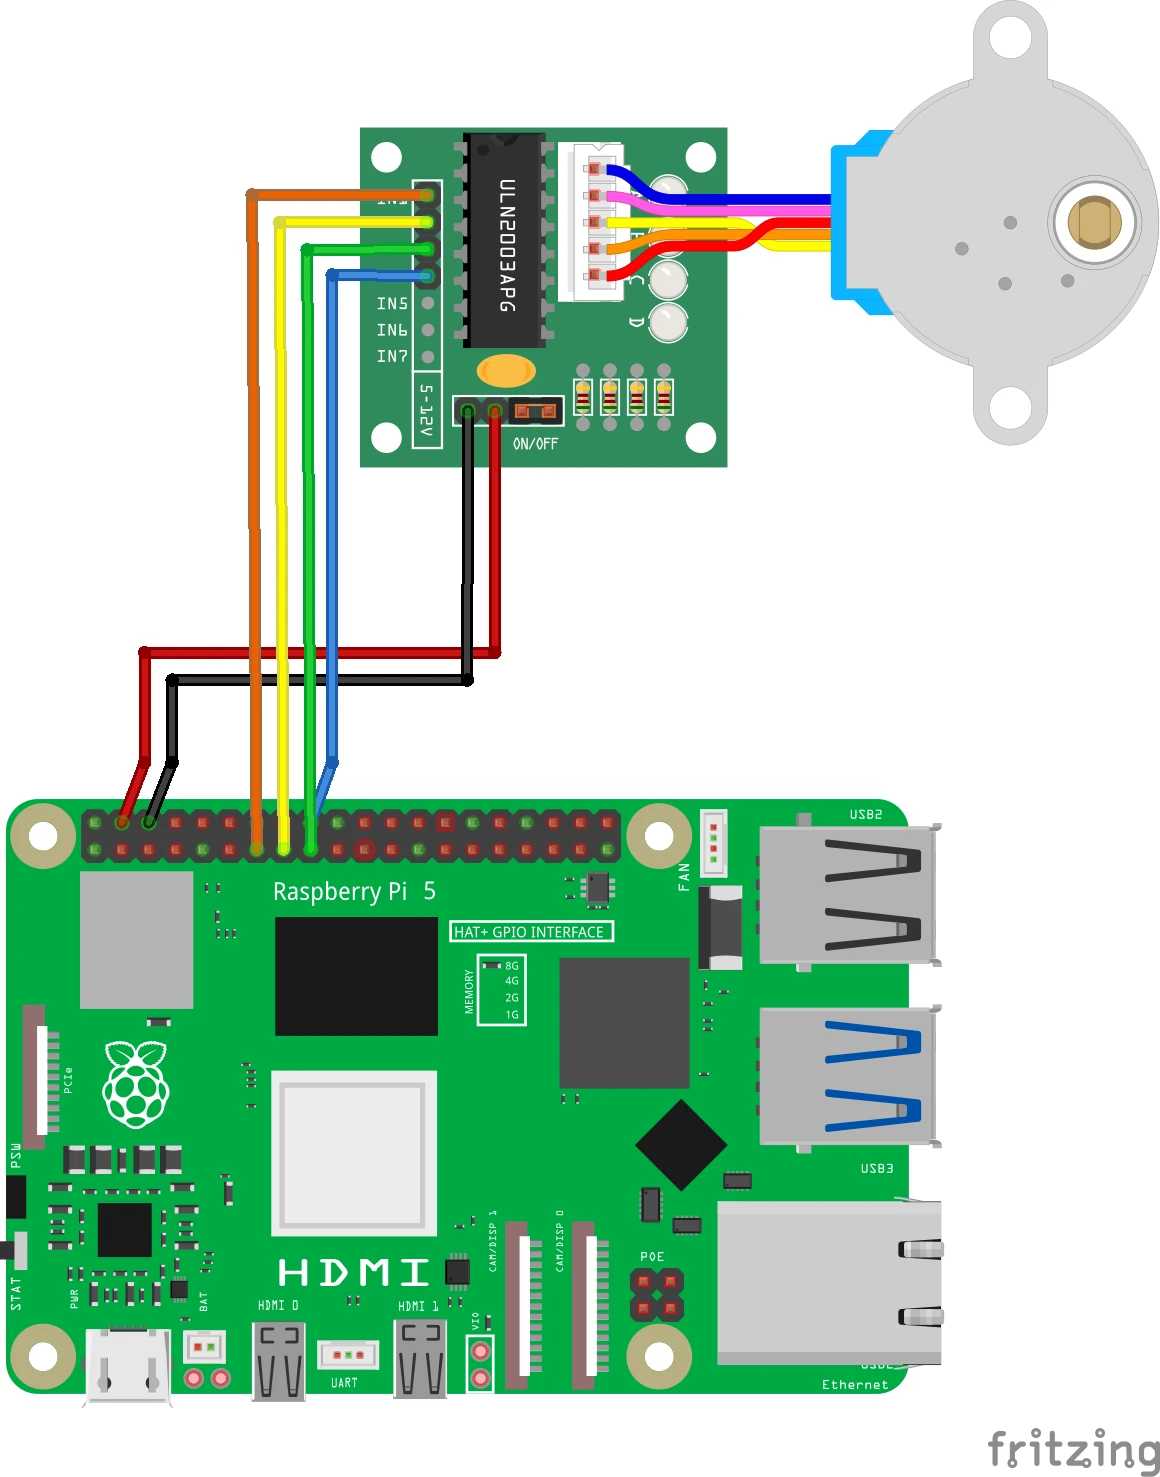
Connection diagram
- Connect the stepper motor to the ULN2003 driver:
- Connect the connector of the stepper motor to the header of the ULN2003 driver.
- Connect the ULN2003 driver to the Raspberry Pi:
- IN1: Connect to GPIO 17 (pin 11).
- IN2: Connect to GPIO 27 (pin 13).
- IN3: Connect to GPIO 22 (pin 15).
- IN4: Connect to GPIO 23 (pin 16).
- Power supply for the ULN2003 driver:
- VCC: Connect to 5V (pin 2).
- GND: Connect toGND (pin 6).
Pinout Reference
GPIO | Pin # | Function | Connection |
| GPIO 17 | Pin 11 | IN1 | ULN2003 driver |
| GPIO 27 | Pin 13 | IN2 | ULN2003 driver |
| GPIO 22 | Pin 15 | IN3 | ULN2003 driver |
| GPIO 23 | Pin 16 | IN4 | ULN2003 driver |
| 5V | Pin 2 | Nutrition | ULN2003 driver |
| GND | Pin 6 | Earth (Ground) | ULN2003 driver |
Python-code in Thonny
Step 1: Install RPi.GPIO
Make sure the RPi.GPIO library is installed. This is usually included in Raspberry Pi OS by default.
pip install RPi.GPIOStep 2: Write your code
Open the Thonny Python IDE and enter the following code:
import RPi.GPIO as GPIO
from time import sleep

# GPIO-pinnen koppelen aan ULN2003 IN-pinnen
IN1 = 17
IN2 = 27
IN3 = 22
IN4 = 23

# Pinnen instellen
GPIO.setmode(GPIO.BCM)
GPIO.setup(IN1, GPIO.OUT)
GPIO.setup(IN2, GPIO.OUT)
GPIO.setup(IN3, GPIO.OUT)
GPIO.setup(IN4, GPIO.OUT)

# Stepper motor sequence (4-fase stappen)
step_sequence = [
    [1, 0, 0, 0],
    [1, 1, 0, 0],
    [0, 1, 0, 0],
    [0, 1, 1, 0],
    [0, 0, 1, 0],
    [0, 0, 1, 1],
    [0, 0, 0, 1],
    [1, 0, 0, 1]
]

def set_step(w1, w2, w3, w4):
    """Stel de status van de motorpinnen in."""
    GPIO.output(IN1, w1)
    GPIO.output(IN2, w2)
    GPIO.output(IN3, w3)
    GPIO.output(IN4, w4)

def step_motor(steps, delay, reverse=False):
    """Draai de motor een aantal stappen."""
    if reverse:
        sequence = step_sequence[::-1]  # Keer de sequentie om
    else:
        sequence = step_sequence

    for _ in range(abs(steps)):
        for step in sequence:
            # Zorg ervoor dat elke stap 4 waarden bevat
            if len(step) == 4:
                set_step(*step)
            else:
                raise ValueError("Step sequence must contain exactly 4 values")
            sleep(delay)

try:
    print("Stepper motor draait vooruit...")
    step_motor(512, 0.002)  # Draai 512 stappen vooruit
    sleep(1)

    print("Stepper motor draait achteruit...")
    step_motor(512, 0.002, reverse=True)  # Draai 512 stappen achteruit
    sleep(1)

except KeyboardInterrupt:
    print("\nProgramma gestopt.")
finally:
    GPIO.cleanup()  # Reset de GPIO-instellingen
Step 3: Save the file
Click File > Save As and name the file stepper_motor_intro.py.
Step 4: Run the script
Click the greenRun button (▶) at the top the Thonny interface.
How does it work?
- Step sequence:
- The engine runs through the sequences in the step_sequence list to activate.
- The step_motor()-function checks how many steps the motor turns and the speed of the steps.
- Adjust speed:
- Adjust the value of delayon in the step_motor()function to change the speed of the motor.
- Adjust direction:
- Use a negative value for steps to turn the engine in the other direction.
Result
- Forward rotation: The stepper motor rotates forward 512 steps (one full rotation).
- Backward rotation: The stepper motor rotates backward 512 steps.
Experimenting
- Adjust speed:
- Change the value of delay in step_motor() (for example 0.001 for faster or 0.005 for slower rotation).
- Adjust number of steps:
- Adjust the number of steps to perform half a rotation (256 steps) or multiple rotations.
- Combined movements:
- Combine forward and backward movements at different speeds to create complex movements.