5210+ reviews
Order by 16:00 for same day shipping
14 days return
DE
EN
Individual
Business
Raspberry Pi project: Install Domoticz
In this project you will learn how to install Domoticz on a Raspberry Pi . With Domoticz you can control the home automation in your home via your web browser.
There have been some issues with Raspberry 5 and domoticz, see the bottom of the document for what the problem could be and how to solve it.
This manual covers:
- Supplies
- Preparing the Raspberry Pi
- Setting up the Raspberry Pi
- Installing Domoticz
- Accessing the web interface
Preparing your Raspberry Pi
Now that you have everything set up, let's start installing Raspbian Lite. Raspbian Lite is the lightest version of Raspbian, the OS for the Raspberry Pi . Insert your micro SD card into your computer via an adapter and boot the Raspberry Pi imager. Allow the Raspberry Pi imager to make changes to your system.
What you will now see is the following:

First we are going to select an Operating System (OS). In this case Raspbian Lite.
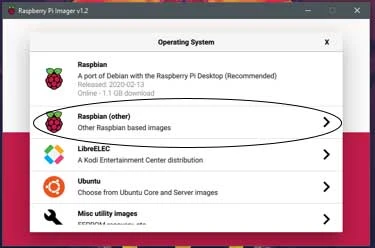
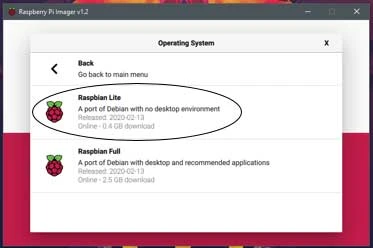
Now that you have selected your OS it is time to select the correct SD card.

We use a 16GB micro SD card. What you see here may differ based on your micro SD card.

Once you have selected your micro SD card you will arrive at the following screen.

You will now go through the following three screens. When the writing process is finished you can close the imager. After this remove the micro SD card.


Setting up the Raspberry Pi
Now that you have installed Raspbian Lite on your micro SD card it is time to make some adjustments to the settings. First, put the micro SD card back into the computer. This process consists of one step that you only need to perform if you do not have an Ethernet connection. The second step is necessary for both an Ethernet connection and a wireless connection.
Configure WiFi (not necessary if you have an Ethernet connection)
First go to Windows Explorer and then to My Computer.
You will now find a screen similar to the picture on the right. Now click on the “boot” disk.
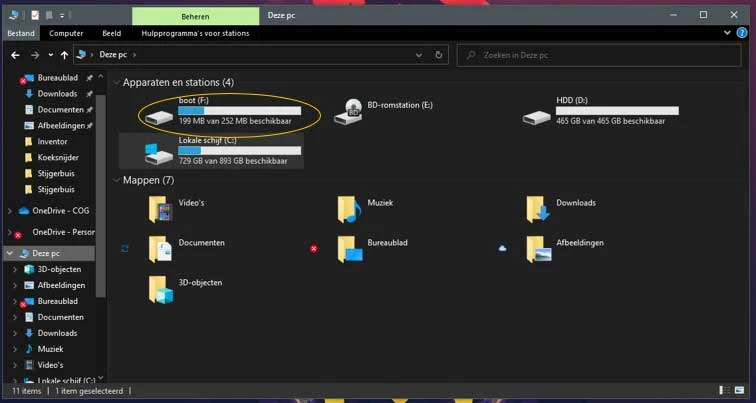
We are going to work in the “boot” disk. Here you will find something similar to the following picture.

What we are going to do now is modify the ”wpa_supplicant.conf”' and add it to the ”boot” drive. If all goes well, you have downloaded this file under requirements. If not, look below this text. Open the document with notepad. If all goes well, you should see the following text. If not, copy the following text.
ctrl_interface=DIR=/var/run/wpa_supplicant GROUP=netdev
update_config=1
country=NL

network={
 ssid=”Jouw_Netwerk_Naam”
 psk=”Jouw_Netwerk_Wachtwoord”
 key_mgmt=WPA-PSK
}
Now customize “Your_Network_Name” and “Your_Network_Password” with your WiFi's name and password.
In our case:
Name: Electronics For You
Password: Electronics@123
Here next to it you see an example of the end result.
ctrl_interface=DIR=/var/run/wpa_supplicant GROUP=netdev
update_config=1
country=NL

network={
 ssid=”Elektronica Voor Jou”
 psk=”Elektronica@1234″
 key_mgmt=WPA-PSK
}
If you do not want your wifi password to be readable in the configuration file, use the following to encrypt the key.
wpa_passphrase “Your_Network_Name”
Then enter your WiFi password and you will receive an encrypted key in response.
Change the above configuration:
By
psk=”Your_Network_Password”
Once you have edited this document and saved it to the “boot” drive you can proceed to the next step.
psk=17235aaa79fff0-932781590872387954237548127Configure remote access
Go to windows explorer and then to this computer. Now click on the hard drive called: ”boot”. And paste the following file in here: ssh
You are now ready to install domoticz. Remove the micro SD card from your PC and insert the micro SD card into your Raspberry Pi . Now connect the Raspberry Pi to your power supply and possibly with an ethernet cable.
Install Domoticz
We are now going to connect to our Raspberry pi. This process consists of two steps. Finding the IP address of the Raspberry and connecting and installing domoticz.
If you have a keyboard and monitor connected, you can also log into the terminal and run the following command.
ip as
This allows you to see both the WiFi and wired IP numbers.
Finding the IP address
In the search bar, search for “cmd”. Then press enter.
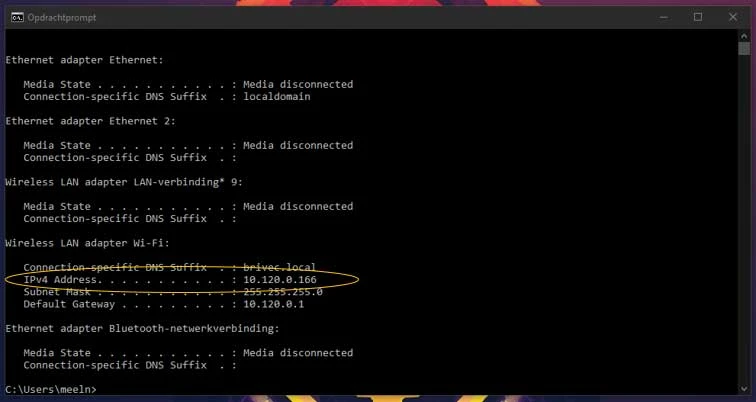
The program you see here should now be open. Type the command 'ipconfig' and press enter.
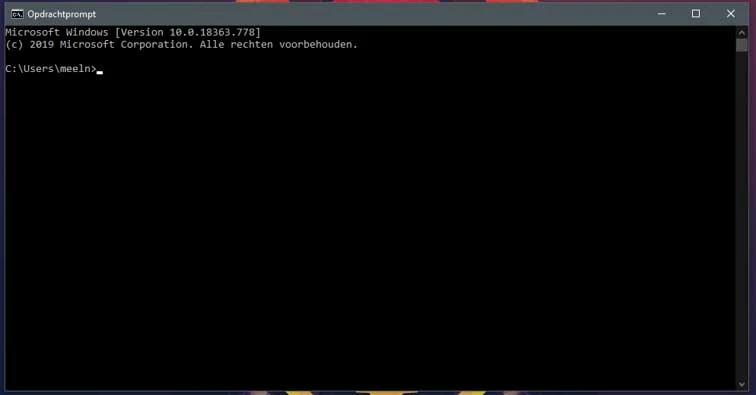
Next, you will see something similar to the photo next to it.
Search for IPv4 Address. Here you will find your IP address. This is important for finding the IP address of your Raspberry Pi .
Your IP address will consist of xxxx , in our case 10.120.0.166 .
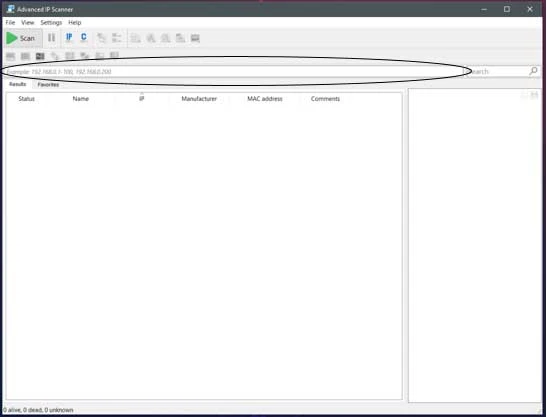
Now open advanced IP scanner , a program for preparation.
You will now see this. In the circled line type xxx0-254 , so in our case 10.120.0.0-254 .
Then click Scan.
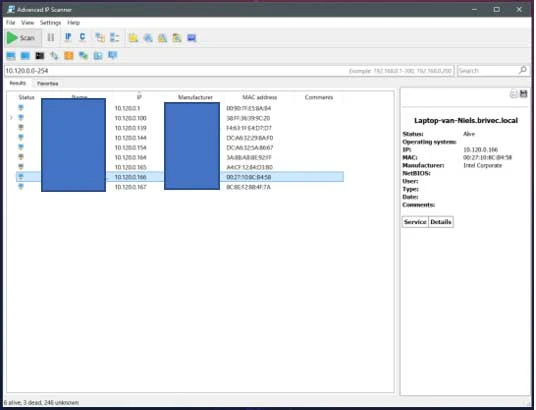
Please wait until you have finished scanning.

You will now see a list of Device Names, IP Addresses, Manufacturers and MAC Addresses. Unfortunately, we cannot see a manufacturer or name for the Raspberry Pi . So we are going to search for a MAC address. A MAC address consists of XX:XX:XX:XX:XX:XX. For a Raspberry Pi this always starts with DC:A6:32: or B8:27:EB: . Now search for such a MAC address and see which IP address is listed. In our case '10.120.0.154'.
Connecting to your Raspberry Pi
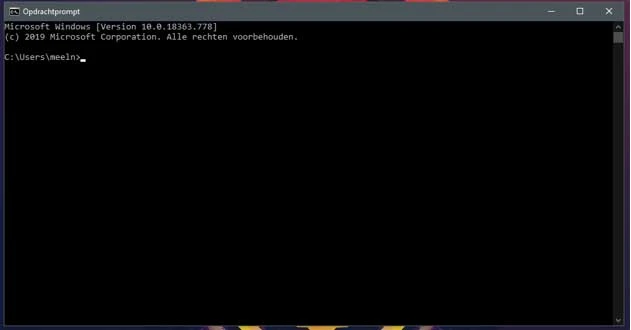
Go back to the windows search bar and type 'cmd'. Hit enter.
You will now see the following screen.
Now type 'ssh pi@xxxx', where xxxx is the IP address of your Raspberry Pi . In our case it will be 'ssh pi@10.120.0.154'. After filling it in, click enter.
You will now see the following. Type 'yes'. Hit enter.

You will be asked for a password. The default password is 'raspberry'. Type this password. When typing passwords, no characters will appear. This is normal. Press enter after filling in your password.
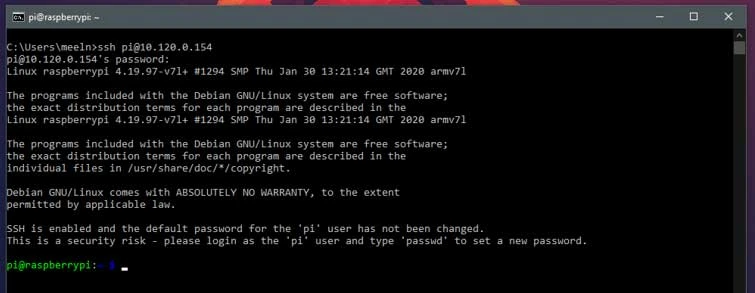
You are now logged into your Raspberry Pi . The first thing we are going to do is create a new password, so that not everyone can get to your Raspberry Pi . Type 'passwd' and hit enter. Type your current password and then the new password twice. Hit enter after each password.
You now have a secure Raspberry Pi that only you can access. We need to perform a few more steps until domoticz is ready to use. Type the command 'sudo apt-get update' and hit enter. Wait for the process to finish. This command will update your Raspberry Pi .
Now that we have everything prepared, it is finally time. We are going to install domoticz. Type the command 'sudo su'. Then type
' curl -sSL install.domoticz.com | sudo bash '. Click enter.
Now that we have everything prepared, it is finally time. We are going to install domoticz. Type the command 'sudo su'. Then type
' curl -sSL install.domoticz.com | sudo bash '. Click enter.
Raspberry 5
The current version of the Raspberry OS Bookworm has not supported the libssl1.1 library for some time.
A known workaround was to disable ssl in the config.
DAEMON_ARGS=”$DAEMON_ARGS -sslwww 0″
Since some people still experienced problems, we have a working installation manual for you below.
We used the imager to put Raspberry OS (bookworm) on the SDcard (full) and put it in a RPi5.
After the automatic update of the OS we executed the command below.
sudo bash -c “$(curl -sSfL https://install.domoticz.com)”
We enabled http over 8080 and https (ssl) on 443
After a reboot domoticz was available over both http and https
(of course a warning because the certificate is not valid from the ssl, but this is normal behavior.)
In our case, the correct SSL library was immediately installed on the OS.
(This is a new package included in the OS last month?)
There was also no problem with automatic start.
Below is some additional debugging information that may help you further with an existing installation.
root@raspberrypi:~# lsb_release -a
No LSB modules are available.
Distributor ID: Debian
Description: Debian GNU/Linux 12 (bookworm)
Release: 12
Codename: bookworm
root@raspberrypi:~# ldd /home/pi/domoticz/domoticz | grep libssl
libssl.so.1.1 => /lib/aarch64-linux-gnu/libssl.so.1.1 (0x00007fff5d250000) <——— this was the problematic library that was not included with RPi OS by default.
root@raspberrypi:~# ss -tulips | grep domo
tcp LISTEN 0 128 *:6144 *:* users:((“domoticz”,pid=2025,fd=25)) ino:20841 sk:3 cgroup:/system.slice/domoticz.service v6only:0 <->
tcp LISTEN 0 128 *:8080 *:* users:((“domoticz”,pid=2025,fd=11)) ino:20825 sk:4 cgroup:/system.slice/domoticz.service v6only:0 <->
tcp LISTEN 0 128 *:443 *:* users:((“domoticz”,pid=2025,fd=18)) ino:20832 sk:5 cgroup:/system.slice/domoticz.service v6only:0 <->
if you don't have this library:
apt-get update
apt-get install libssl1.1
Manually downloadable here:
( https://archive.raspberrypi.com/debian/pool/main/o/openssl/libssl1.1_1.1.1w-0~deb11u1+rpt1_arm64.deb )
The error message if this library is missing looks like this:
sudo journalctl -u domoticz
Nov 12 21:38:49 RaspPi systemd[1]: Starting domoticz.service – LSB: Home Automation System…
Nov 12 21:38:49 RaspPi domoticz.sh[9933]: Time synchronized, starting Domoticz…
Nov 12 21:38:49 RaspPi domoticz.sh[9941]: /home/pi/domoticz/domoticz: error while loading shared libraries: libssl.so.1.1: cannot open shared object file: No such file or directory
The web interface
To connect to the web interface, go to your Raspberry Pi 's IP address in your web browser, xxx.xxx.xxx.xxx, then type ":" and the port you chose. It should be 8080 or 8888. In our case, we're going to http://10.120.0.154:8080 or http://10.120.0.154:8888 (https://10.120.0.154)
