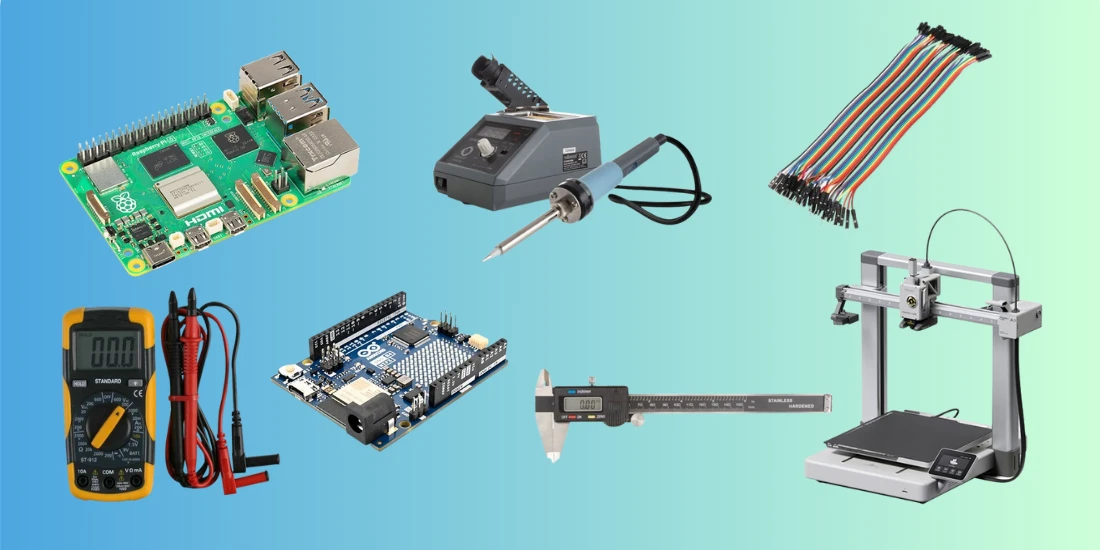
7 tools every maker should have
Are you a fanatic hobbyist with a soldering iron? Building an IoT project with an ESP32? Or do you work with a 3D printer daily? Whatever you build, you'll get nowhere without the right tools.
The world of making is vast. From electronics and programming to mechanics and 3D design. Yet all makers share one thing: the right tools make all the difference.
Good tools make your work easier. You'll work more precisely, achieve better results, and have more fun. But where do you start when setting up your workspace? Which tools are truly indispensable?
In this blog post, we share 7 tools that no makerspace should be without. They form the foundation for every successful project. Whether you're working on smart devices, robotics, 3D models, or electronic circuits, these tools will help you get started!
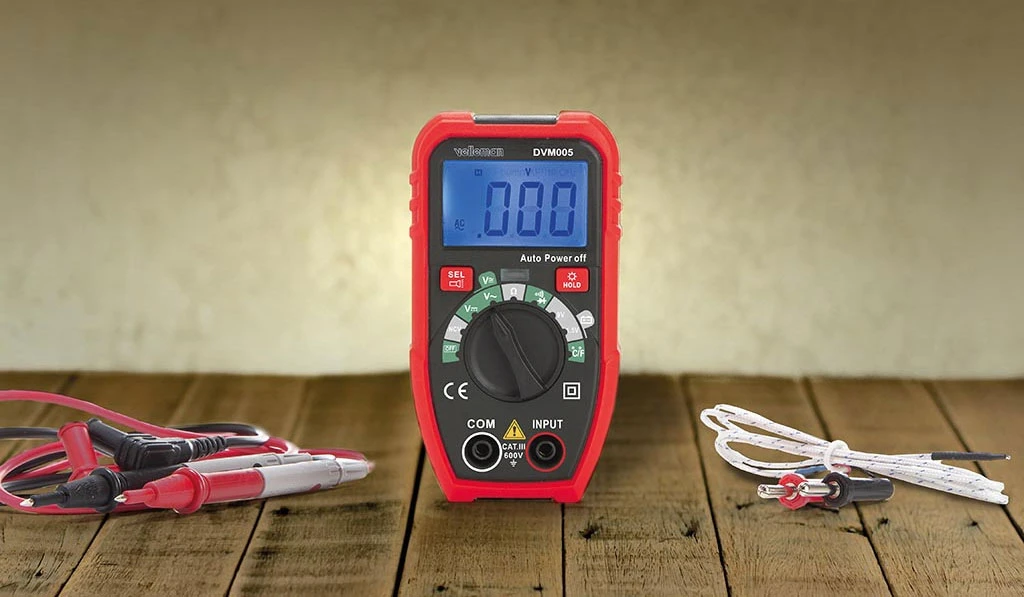
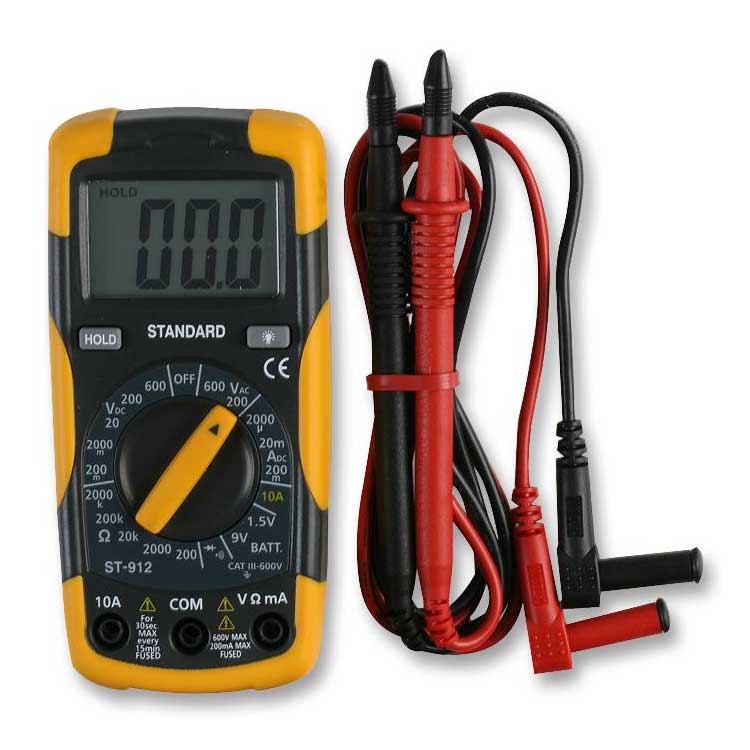
1. Multimeter – Measuring is knowing
Anyone working with electronics can't do without a multimeter. Whether you're building an LED circuit, reading a sensor, or debugging a microcontroller, without measurement data, you're working blindly.
A digital multimeter gives you insight into what's really happening in your circuit. You can:
- Measuring voltage (AC and DC)
- Check resistance
- Determine current strength
- Continuity testing, ideal for checking whether wires or connections are good
- Testing batteries for remaining charge
- Use additional functions such as temperature, frequency or diode measurements (depending on the model)
For beginners, a simple model is often sufficient. Consider a Tenma digital multimeter. Looking for more precision or professional work? Then choose a Joy-IT JT-MT01, for example.
A multimeter helps detect and prevent errors. You can see if there's voltage on a pin before you connect anything. This protects your components and prevents unnecessary damage or frustration.
Tip: Use the correct measuring range. Make sure the probes are properly inserted. Never measure current without knowing what you're doing; it's risky and could damage your multimeter (or worse).
In short: a multimeter is your most important measuring tool. Every maker should have at least one.
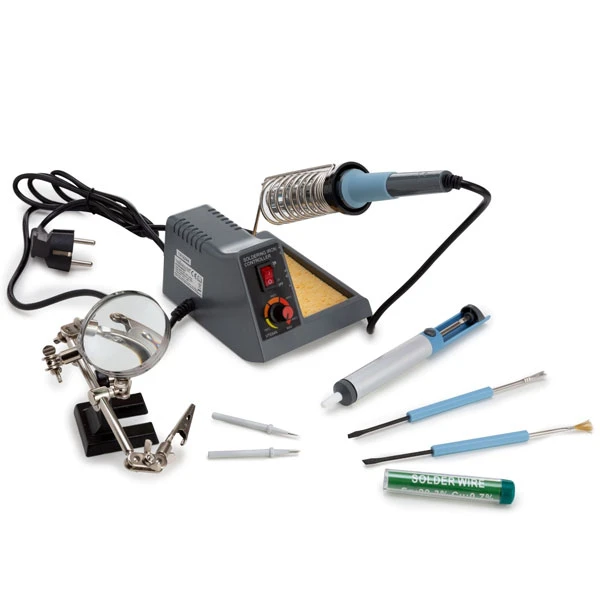
2. Soldering Iron and Accessories – The Basics of Every Electronics Project
Want to turn a temporary prototype into something permanent? Then you need to solder. A soldering iron is the tool for securely and electrically connecting components. Without a soldering iron, you'll be stuck at a breadboard. Fine for testing, but not ideal for permanent projects.
A good soldering iron heats up quickly, maintains its temperature, and has a fine tip. This allows you to work precisely without damaging components. Many makers opt for a temperature-adjustable iron or soldering station. These offer more control and are more comfortable to work with. Brands like Velleman are popular for their price and reliability.
Accessories also make a difference:
- Solder with flux core – ensures good adhesion.
- Desoldering pump or soldering wick – useful for correcting mistakes.
- Third hand – keeps your workpiece steady.
- Sponge or brass wool – keeps the soldering tip clean.
- Fume extractor – removes harmful smoke.
Tip: Practice on an old circuit board first. This way you'll get a feel for heat, timing, and technique.
With the right tools, you can repair printed circuit boards, connect wires, and build circuits that last. You create your own electronics, exactly the way you want them.
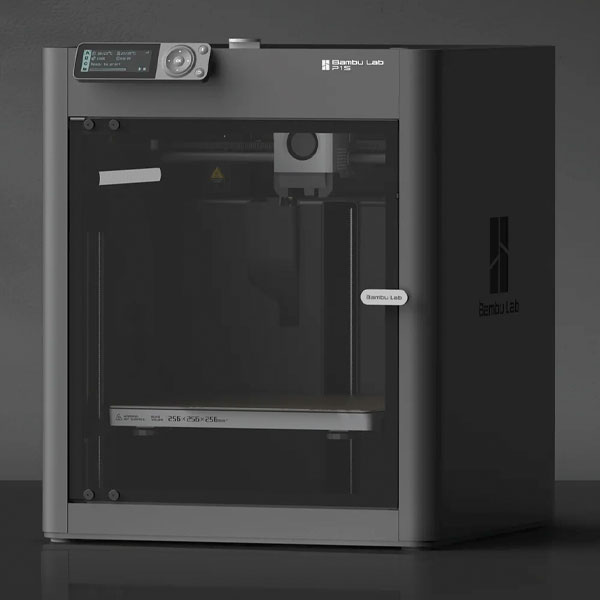
3. 3D Printer – Bringing Ideas to Life
For many makers, the 3D printer is the ultimate symbol of creative freedom. You no longer have to search for pre-made parts. You can simply print them yourself quickly, precisely, and to size. Think of a project box for your Raspberry Pi , a sensor holder, or a unique part that's no longer available anywhere.
3D printers have become much more accessible in recent years. Brands like Bambu Lab offer good models for all skill levels. Want to print quickly and accurately with minimal settings? Then the Bambu Lab P1S or X1C are excellent choices.
What can you print?
- Enclosures for electronics, IoT or robotics
- Mechanical parts such as gears, clips or switches
- Unique tools you can't buy anywhere
- Visual additions such as buttons, fronts or panel plates
Good to know: Most printers use PLA, PETG, or ABS. PLA is easy to use and suitable for standard applications. PETG is stronger and moisture-resistant. ABS is heat-resistant, but more difficult to print.
A rich ecosystem exists around 3D printing. Websites like Thingiverse, Makerworld, and Cults3D offer thousands of free models. With design software like Fusion 360, Tinkercad, or FreeCAD, you can easily create your own designs.
A 3D printer is more than just a device. It's an engine for innovation. You bring ideas to life in your own way.
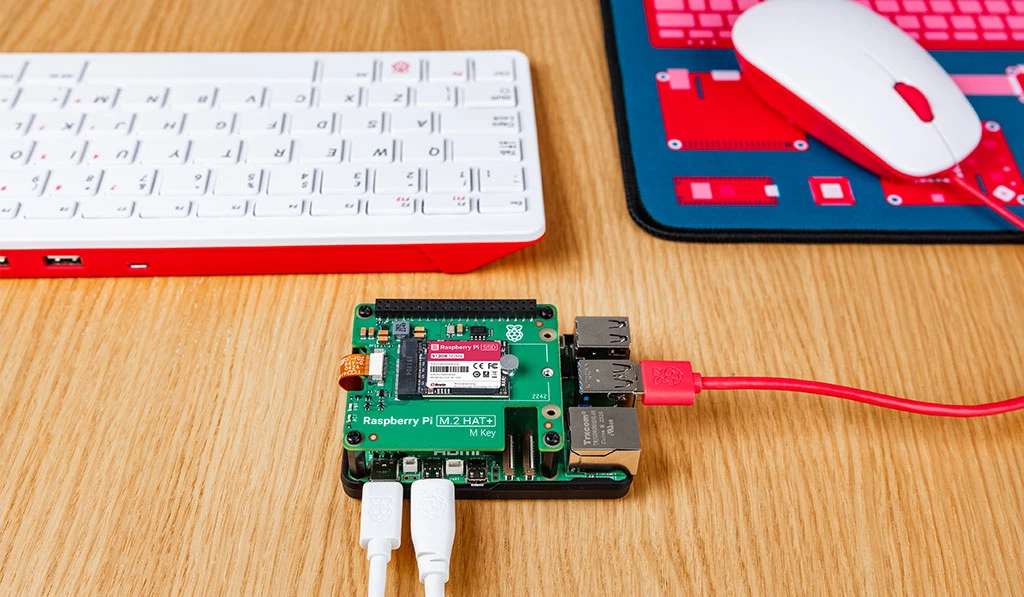
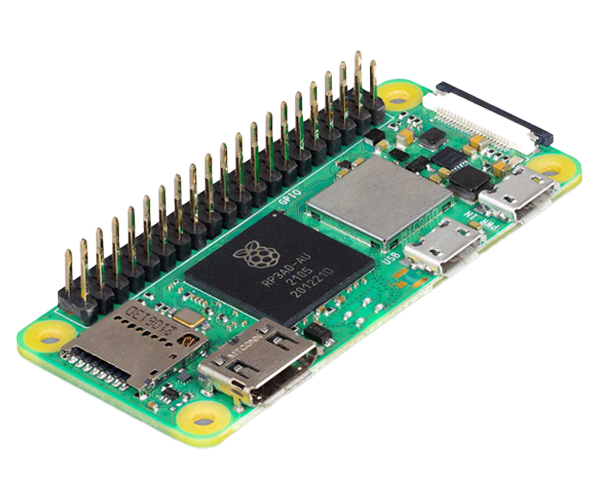
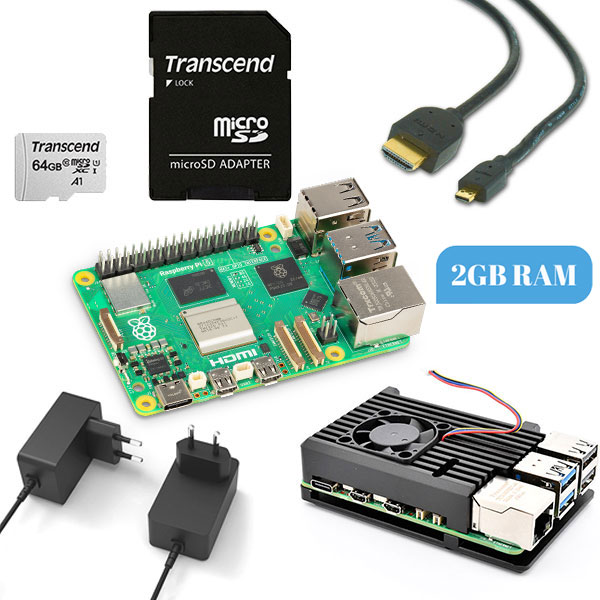
4. Raspberry Pi or microcontroller – The brain of your project
Behind every smart home project is a brain: a microcontroller or minicomputer. Whether you're building a weather station, controlling a robot, or automating your home, you need something that reads signals, makes decisions, and executes actions. That's where the Raspberry Pi , Arduino, or ESP32 comes in.
Raspberry Pi – a full-fledged minicomputer
The Raspberry Pi is ideal for projects that require an operating system. Consider:
- Media and retro game consoles
- Home automation with Home Assistant
- Small web servers or data systems
- Cameras and security solutions
This small powerhouse has USB, HDMI, Wi-Fi, and GPIO pins. It often runs in a desktop environment. A Raspberry Pi is therefore useful for versatile tasks.
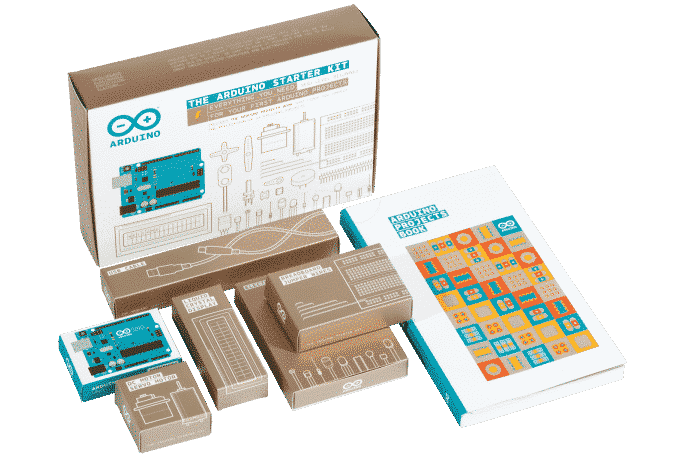
Arduino and ESP32 – small, fast and efficient
For lighter, real-time projects, the Arduino and ESP32 are perfect. They boot instantly, are energy-efficient, and easy to program. The ESP32 also offers Wi-Fi and Bluetooth, making it ideal for IoT projects.
Applications include:
- Smart lighting and sensors
- Temperature and humidity measurements
- Wireless connections
- Motor control and robotics
Tip: Just getting started? Start with an Arduino kit or Raspberry Pi Pico. It's inexpensive, easy, and supported by many tutorials.
Big advantage: the community
Each board has an active user group. Whether you have a question or are looking for inspiration, there's almost always a tutorial, library, or example available.
With a microcontroller or Raspberry Pi you can give your project intelligence. It allows your creation to react, think, and communicate. This way, you build not just something that works, but something that lives.
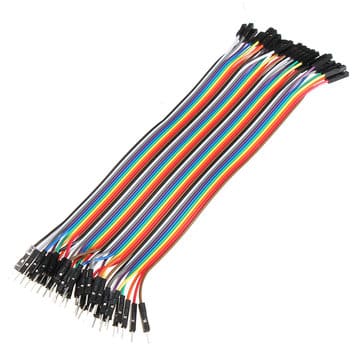
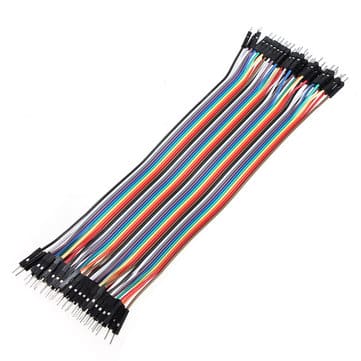
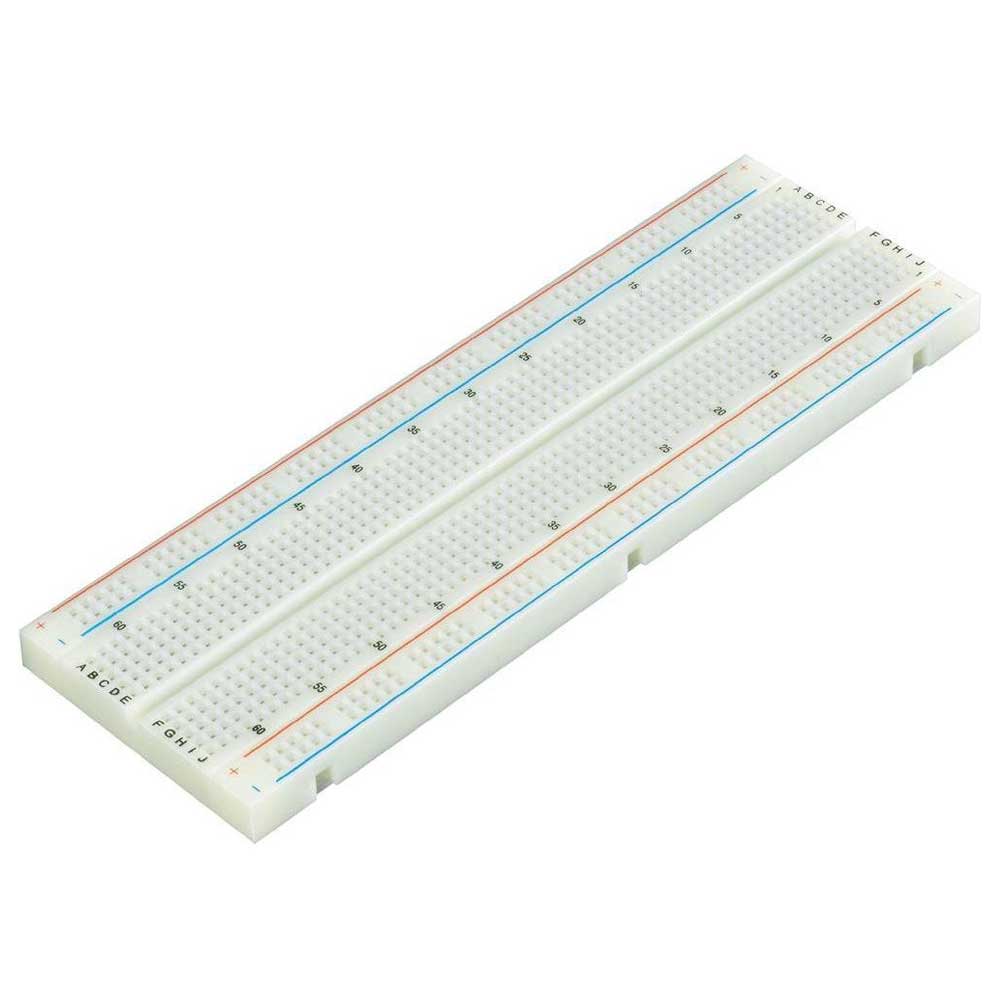
5. Breadboard and jumper wires – For fast and error-free prototyping
Before you start soldering or making printed circuit boards, you want to be sure your circuit works. The best way to do this is with a breadboard and jumper wires. This simple combination allows you to quickly build, test, and modify circuits, all without a soldering iron.
What is a breadboard?
A breadboard is a plastic board with a grid of holes. Metal strips run underneath these holes. These automatically connect the components you insert. This allows you to build circuits without fixed connections and allows you to easily modify or expand them.
Perfect for:
- Beginners who want to learn electronics
- Makers who want to test something quickly
- Try out sensors, resistors or microcontrollers
Jumper wires: flexible and indispensable
Jumper wires are thin, colored wires with pins or connectors on the ends. You use them to quickly make connections on a breadboard or to external modules like an Arduino or Raspberry Pi .
There are three variants:
- Male-to-male: for connections on the breadboard itself
- Male-to-female: from a GPIO pin to a sensor
- Female-to-female: between headers of two modules
An organized set with various colors makes troubleshooting easier. You can see at a glance what goes where.
Tip: Invest in a quality breadboard. Cheap boards often develop poor connections, leading to confusion or errors.
Breadboards and jumper wires are the fastest way to bring ideas to life. They make electronics accessible, safe, and educational. No soldering, no risks. Simply build, test, and improve.
6. Measuring Tools – Precision Makes the Difference
Want to build something that truly fits? Then you need to measure. Not by eye, but precisely. With the right measuring tools, you'll prevent errors and frustration.
This is what you need:
- Digital caliper: Measures accurately to 0.01 mm. Useful for 3D prints, printed circuit boards, and small parts.
- Steel ruler and set square: For quick, straight measurements on paper, wood or plastic.
- Spirit level or inclinometer: Ensures that you hang or align something straight.
- Digital magnifier or microscope: Show your solder joints and printed circuit boards clearly.
- Precision Scale: Measure small amounts of material, such as filament or liquids.
Tip: Check your 3D print with a caliper. This will show you if your printer is off. Adjust your design accordingly.
An error of just one millimeter can be enough to cause your print or part to not fit. Accurate measurements prevent this, saving time and materials.
Measure before you build anything. That way, you know it works. Whether you're working with wood, metal, or electronics, measuring makes the difference between luck and control.

7. Software Tools – Invisible, but indispensable
As a creator, you work with your hands, but without software, you get nowhere. It's the digital tool that shapes, tests, and brings your ideas to life.
Essential software for creators:
- Tinkercad/ Fusion 360 (3D design): Tinkercad is perfect for beginners. You can quickly build simple models in your browser. Ideal for 3D printing and basic shapes. Fusion 360 offers much more: parametric design, simulations, and print preparation. It's also suitable for CNC and technical drawings.
- KiCad/ Fritzing (electronics design): With Fritzing, you can create visual breadboard diagrams. You can immediately see how everything is connected. KiCad is more powerful. You can draw circuit diagrams, design PCBs, and generate production files.
- Arduino IDE/ PlatformIO/ VS Code (coding): The Arduino IDE is simple, perfect for beginners. PlatformIO and Visual Studio Code are for advanced users. They offer better error reporting, version control, and library management. They also support multiple platforms such as the ESP32, STM32, or Raspberry Pi Pico.
- Home Assistant/ Node-RED/ MQTT (home automation & IoT): Automate your home with Home Assistant. Node-RED helps you build visual logic. MQTT enables fast, lightweight communication between sensors and controllers. These tools are at the heart of smart projects.
- Slicer software (3D printing): Slicers like Cura, Simplify3D, and Bambu Studio convert your model into G-code. You set layer height, print speed, infill, and supports. Every detail influences your final result.
Pro tip: Use Git or a similar tool to manage your code and designs. You'll maintain an overview, prevent errors, and easily revert to a previous version.
Software may seem invisible, but it's crucial. It makes your work faster, better, and repeatable. For every step, there's a tool to help you build, test, or automate. Good software is the glue between idea and execution.
Conclusion
Whether you're just starting out or have been building for years, good tools make all the difference. Tools like a multimeter, soldering iron, 3D printer, and breadboard form the foundation of every project. Together, they create a workspace where your ideas come to life.
You don't have to buy everything at once. Start small. A multimeter, breadboard, and a few jumper wires will get you far. As your projects grow, expand. Think of a soldering station, a 3D printer, or an ESP32. Each new tool opens up new possibilities.
Invest in quality. Good tools are more enjoyable to use, last longer, and prevent frustration. They ensure reliability and peace of mind. This way, you can focus on what really matters: building and exploring.
A maker is never finished. You keep learning, testing, and improving. With these seven tools, you'll build more than just working circuits or functional boards. You'll gain experience, insight, and creativity.
So grab your tools, follow your curiosity, and get started. What you create doesn't matter. The creation itself is where the magic lies.